
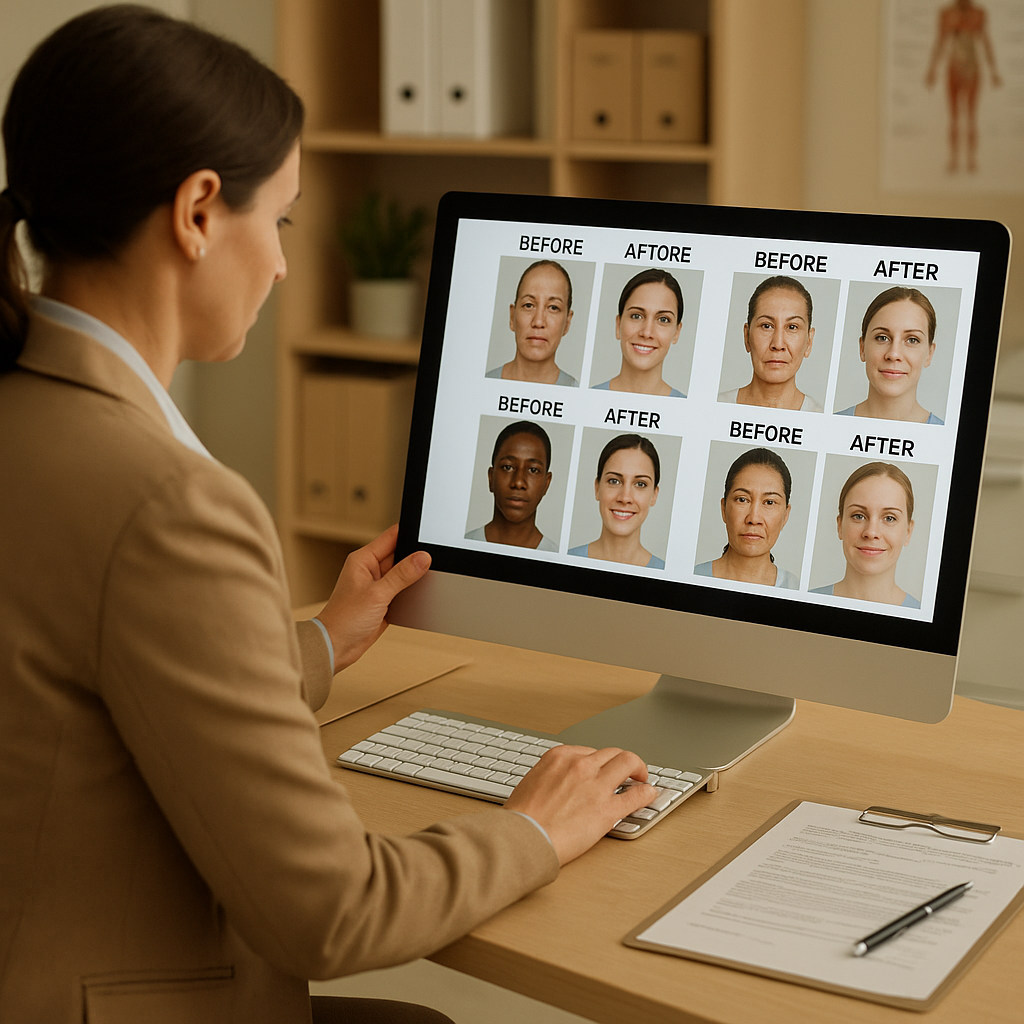
Your before-and-after gallery might be the most important page on your website. When prospective patients are researching aesthetic procedures—whether it’s rhinoplasty, breast augmentation, or injectables—they’re not just reading about what you do. They’re looking for proof that you can deliver the results they want.
A poorly executed gallery creates doubt. Inconsistent lighting, awkward angles, and disorganized layouts make even excellent work look questionable. But a well-crafted gallery does the opposite: it builds trust, demonstrates expertise, and moves visitors closer to booking a consultation.
Here’s how to create a before-and-after gallery that actually converts.
Why Your Gallery Matters More Than You Think
Aesthetic medicine is inherently visual. Unlike other medical specialties where patients trust credentials and reviews, aesthetic patients need to see your work before they’ll consider trusting you with their appearance.
Studies show that 72% of patients research providers online before scheduling consultations. Of those, nearly 90% say before-and-after photos significantly influence their decision. Your gallery isn’t supplementary marketing—it’s often the deciding factor.
But here’s where most practices go wrong: they treat the gallery as an afterthought. Photos are taken inconsistently, uploaded without organization, and displayed without thought to user experience. The result is a gallery that undermines rather than supports conversion.
The practices that excel understand something important: a before-and-after gallery is a sales tool. Every image, every layout choice, and every organizational decision should serve a single purpose—building enough confidence in prospective patients that they pick up the phone.
Photography Standards That Build Credibility
The quality of your photos directly reflects the quality of your practice. Inconsistent, amateur-looking images suggest inconsistent, amateur work—even when the actual results are excellent.
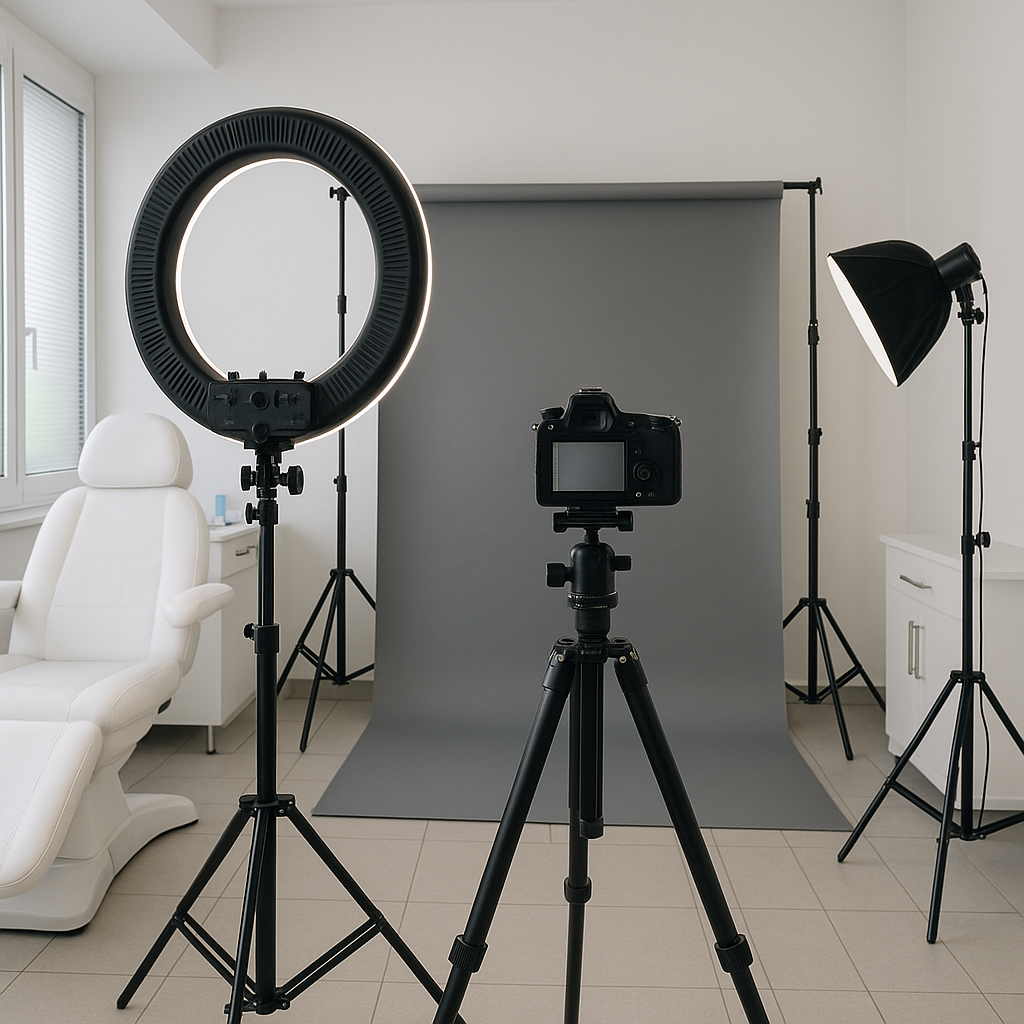
Consistent Lighting and Background
Every before-and-after pair should look like it belongs together. This means standardizing:
-
Lighting: Use consistent, soft lighting that eliminates harsh shadows. Ring lights or softboxes work well for facial procedures. Avoid natural light from windows—it changes throughout the day and creates inconsistent results.
-
Background: A neutral gray or white backdrop eliminates distractions. Many practices use seamless paper backdrops that can be replaced when they show wear.
-
Distance: Mark floor positions for both photographer and patient. This ensures consistent framing across all photos.
Matching Angles and Poses
Nothing destroys credibility faster than before-and-after photos taken from different angles. A patient photographed from slightly below in the “before” shot and from above in the “after” will show apparent changes that have nothing to do with the procedure.
Standard angles for facial procedures typically include:
- Frontal view (face camera directly)
- 45-degree oblique (left and right)
- 90-degree profile (left and right)
For body procedures, capture:
- Front view
- Side profile (left and right)
- Back view when relevant
Timing Your After Photos
Rushing to photograph results is tempting but counterproductive. Swelling, bruising, and healing processes affect how results appear. Most surgical results need 3-6 months before final photos should be taken. Injectable results typically stabilize within 2-4 weeks.
Document the timing in your image metadata or gallery labels. “6 months post-rhinoplasty” tells prospective patients exactly what to expect and demonstrates transparency about healing timelines.
Organizing Your Gallery for Maximum Impact
A disorganized gallery frustrates visitors and undermines trust. If patients can’t easily find results relevant to their concerns, they’ll leave—often to a competitor with a better-organized website.
Filter by Procedure Type
At minimum, your gallery should be filterable by procedure category. Patients researching breast augmentation don’t want to scroll through rhinoplasty results to find relevant examples.
Create clear categories:
- Facial procedures (with subcategories for specific treatments)
- Body contouring
- Breast procedures
- Non-surgical treatments
- Combination procedures
Consider Secondary Filters
Depending on your volume of cases, additional filters can dramatically improve user experience:
-
Age range: A 55-year-old researching facelifts wants to see results on patients with similar skin quality and facial structure. Age-appropriate examples are more persuasive than generic results.
-
Body type: For body procedures, showing results on patients with similar starting points helps set realistic expectations.
-
Technique variations: If you offer multiple approaches to the same procedure (different implant types, incision locations, etc.), let patients filter by these variables.
Pair Images with Context
Bare before-and-after photos without context leave questions unanswered. Effective galleries include:
- Procedure performed: Specific technique names when relevant
- Patient concerns addressed: What the patient wanted to change
- Time since procedure: How long after surgery the “after” photo was taken
- Any relevant details: Implant sizes, filler volumes, or combination procedures
This context helps patients understand what’s achievable and sets appropriate expectations before they ever contact you.
Legal and Ethical Considerations
Before-and-after galleries come with significant legal and ethical requirements that vary by state and specialty board. Ignoring these creates liability and can damage your reputation.
Patient Consent
Every patient whose photos appear in your gallery needs to sign a specific media release. Generic HIPAA forms don’t cover marketing use. Your consent form should explicitly state:
- Photos will be used for marketing purposes
- Where photos may appear (website, social media, printed materials)
- Whether photos may be shared with third parties
- Patient’s right to withdraw consent (with reasonable limitations)
Keep these consent forms permanently. If a patient later disputes their inclusion in your gallery, you need documentation.
Photo Manipulation Guidelines
Most specialty boards have explicit guidelines about digital photo manipulation. The general principle: you can adjust brightness, contrast, and color balance to make before-and-after photos visually comparable, but you cannot alter the actual results.
Prohibited modifications typically include:
- Changing the shape or size of treated areas
- Removing scars, stretch marks, or imperfections
- Adding definition or contouring that wasn’t achieved surgically
- Cropping images to hide unfavorable results
When in doubt, err on the side of minimal editing. The goal is consistency between image pairs, not enhancement.
Representing Typical Results
Your gallery should represent the range of results patients can realistically expect—not just your best outcomes. Including only exceptional results creates unrealistic expectations that lead to disappointed patients and potential complaints.
A balanced gallery includes:
- Excellent results that showcase your best work
- Good results that represent typical outcomes
- Cases with limitations that demonstrate honest representation
This transparency builds trust. Patients appreciate knowing what’s possible and what might limit their results.
Technical Website Implementation
The best photos mean nothing if your website displays them poorly. Technical implementation affects both user experience and search engine visibility.
Image Optimization
High-resolution medical photos are large files that slow page loading. Optimize images without sacrificing diagnostic quality:
- Compress appropriately: Use WebP format with quality settings around 85% for web display
- Serve responsive sizes: Deliver smaller images to mobile devices, larger ones to desktops
- Implement lazy loading: Only load images as users scroll to them, improving initial page speed
Gallery Functionality
Your gallery interface should make comparison easy:
- Side-by-side display: Before and after images should appear adjacent, not stacked
- Zoom capability: Let users examine details without leaving the gallery
- Mobile optimization: Touch-friendly navigation and appropriately-sized images for small screens
- Fast filtering: Procedure filters should update results instantly, not reload the page
SEO Considerations
Your gallery can drive significant search traffic if properly optimized:
- Descriptive file names: “rhinoplasty-before-after-patient-47.jpg” not “IMG_4392.jpg”
- Alt text: Include procedure name and relevant details for accessibility and search
- Structured data: Implement schema markup to help search engines understand your gallery content
- Procedure pages: Link gallery images to detailed procedure information pages
Maintaining Your Gallery Over Time
A gallery isn’t a one-time project. Ongoing maintenance keeps it current, relevant, and legally compliant.
Regular Updates
Add new cases regularly—at least quarterly for active practices. Fresh content signals an active, successful practice. Stale galleries with photos dated several years ago raise questions about current skill levels and patient volume.
Removing Outdated Content
Review your gallery periodically and remove:
- Cases where techniques have evolved significantly
- Photos of patients who’ve withdrawn consent
- Lower-quality images as your photography improves
- Results that no longer represent your typical outcomes
Archival Organization
Maintain an organized archive system that tracks:
- Original high-resolution files
- Patient consent documentation
- Procedure dates and details
- When photos were added to (and removed from) the website
This documentation protects you legally and simplifies future gallery updates.
Converting Gallery Visitors to Consultations
A gallery that impresses visitors but doesn’t prompt action is a missed opportunity. Design your gallery experience to guide visitors toward booking consultations.
Strategic Call-to-Action Placement
Include clear calls-to-action throughout your gallery:
- Within filters: “See results for your procedure—schedule a consultation to discuss your goals”
- Beside images: “Interested in similar results? Book a personalized consultation”
- At gallery end: “Ready to take the next step? Contact us today”
Connect Gallery to Booking
Reduce friction between viewing results and taking action:
- Link directly to online scheduling when possible
- Include phone numbers that are clickable on mobile
- Offer consultation request forms on the gallery page itself
- Consider chat widgets for immediate questions
Retargeting Visitors
Most gallery visitors won’t book immediately. Capture their interest for follow-up:
- Use retargeting pixels to show relevant ads after they leave
- Offer downloadable procedure guides in exchange for email addresses
- Provide virtual consultation options for research-stage visitors
Measuring Gallery Performance
What gets measured gets improved. Track how your gallery performs and optimize accordingly.
Key Metrics
Monitor:
- Gallery page views: How many visitors view your gallery
- Time on page: How long visitors spend viewing images
- Filter usage: Which procedures receive the most interest
- Exit rate: How many visitors leave from the gallery versus continuing to other pages
- Conversion rate: How many gallery visitors eventually book consultations
Testing and Iteration
Use this data to improve:
- If certain procedures get heavy traffic but low conversions, examine those specific images
- If visitors spend little time on the page, evaluate layout and loading speed
- If mobile metrics differ significantly from desktop, prioritize mobile optimization
Your Gallery Is Your Portfolio
In aesthetic medicine, your before-and-after gallery serves the same purpose as a portfolio for an artist or architect. It’s the evidence that backs up every claim you make about your skills and results.
Treat it accordingly. Invest in proper photography equipment and training. Maintain rigorous organizational standards. Ensure legal compliance. Optimize the technical presentation. And never stop improving.
The practices that take their galleries seriously are the ones converting website visitors into consultations—and consultations into satisfied patients who’ll appear in next year’s gallery.
Ready to elevate your practice’s digital presence? Contact Monsoft Solutions to discuss how we can help you create a before-and-after gallery that showcases your work and converts visitors into patients.